
You can manage your Finland Dedicated Server directly from the Packetra client portal. In this guide, we will walk you through the reboot options, rescue system, OS reinstall, bandwidth overview and reverse DNS controls so you can manage your machine in just a few clicks.
Navigate to Your Dedicated Server
First click the Services tab in the top navigation, then select My Services from the dropdown menu.
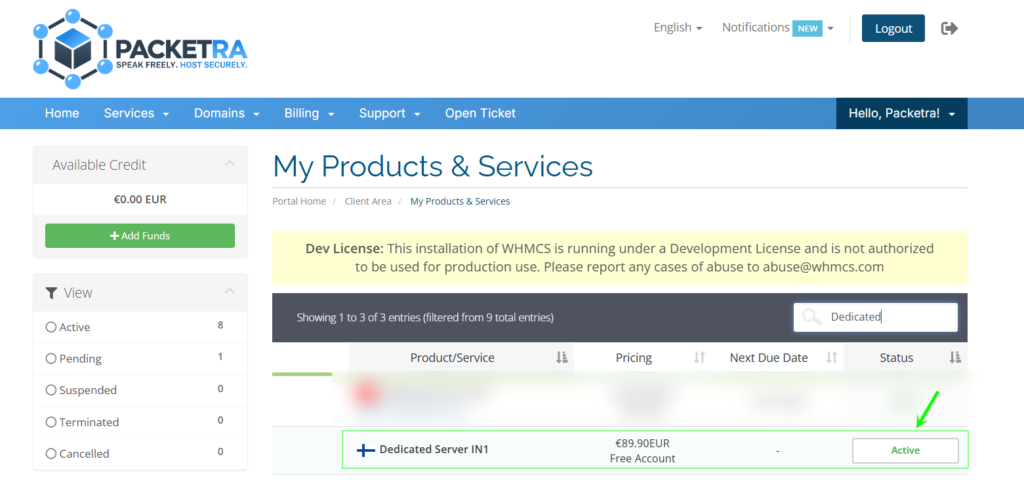
Find the active dedicated server you want to manage and click on it to open the service details page.
At the top of the page you will see your server’s name, current status, main IP, IPv6, traffic, operating system and root password. Below that are three action buttons: Reboot, Rescue and Reinstall. Each button reveals its own panel when clicked, and nothing runs until you press the button inside that panel and confirm.
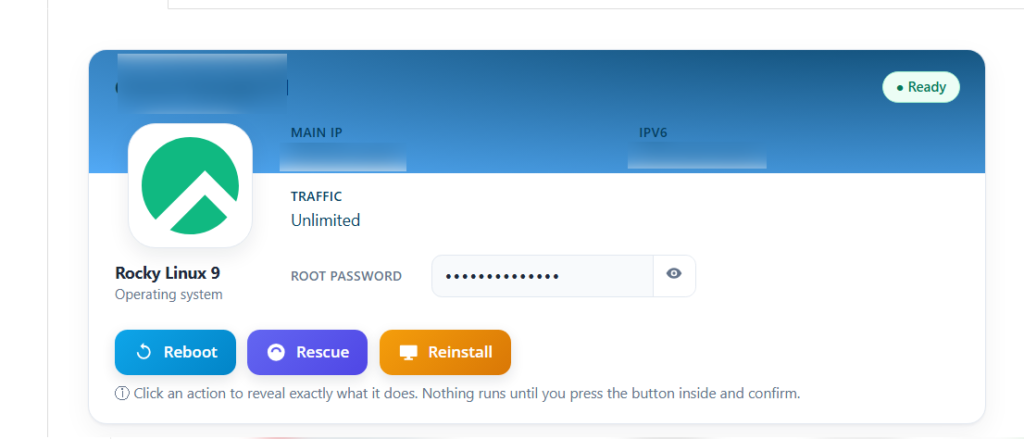
Reboot
Click the Reboot button to restart your server. Choose how you want to restart from the dropdown, then click Reboot now.
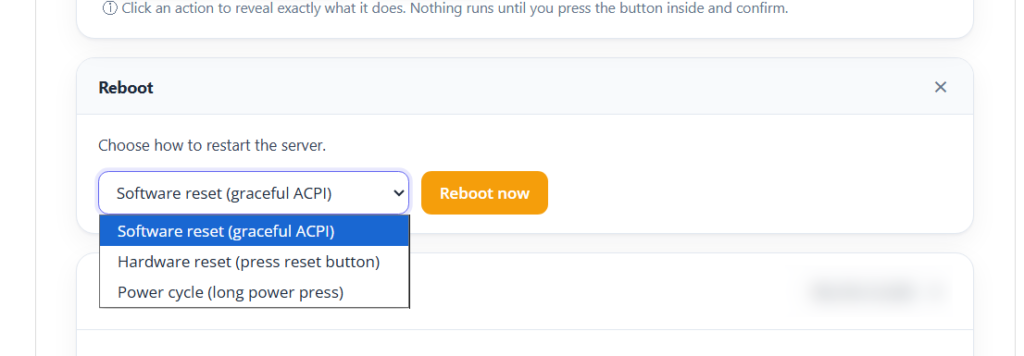
- Software reset (graceful ACPI) – Signals the operating system to restart cleanly, allowing running processes to close properly (recommended for normal use)
- Hardware reset (press reset button) – The equivalent of physically pressing the reset button on the server
- Power cycle (long power press) – Fully powers the server off and then back on, like holding the power button
Rescue System
Click the Rescue button to boot a temporary Linux rescue system over SSH. This is used for recovery, or to install a fresh OS, and your data is untouched until you choose to reinstall.
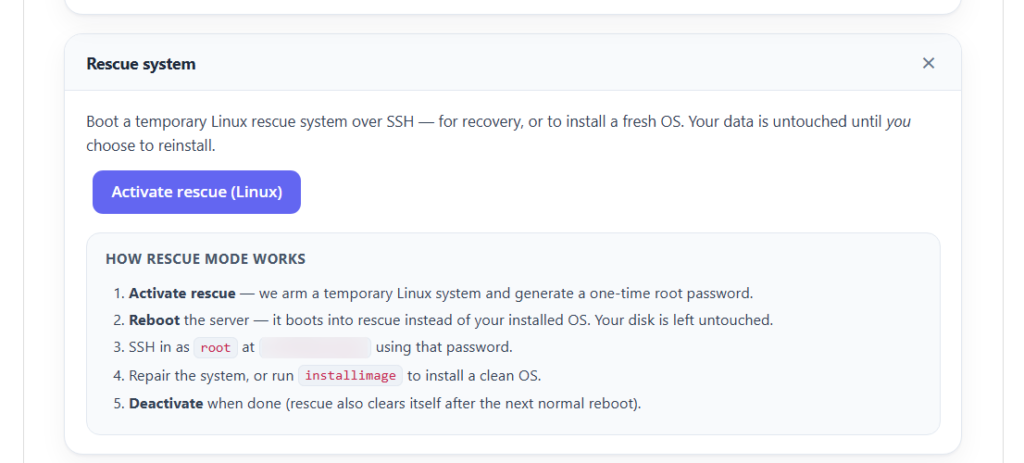
Here is how rescue mode works:
- Activate rescue – We arm a temporary Linux system and generate a one-time root password.
- Reboot the server – It boots into rescue instead of your installed OS. Your disk is left untouched.
- SSH in as root at your main IP using that password.
- Repair the system, or run
installimageto install a clean OS. - Deactivate when done (rescue also clears itself after the next normal reboot).
Reinstall OS (VNC)
Click the Reinstall button to reinstall the operating system from scratch over a graphical VNC connection. Pick a distribution, arm it, then reboot and connect a VNC client.
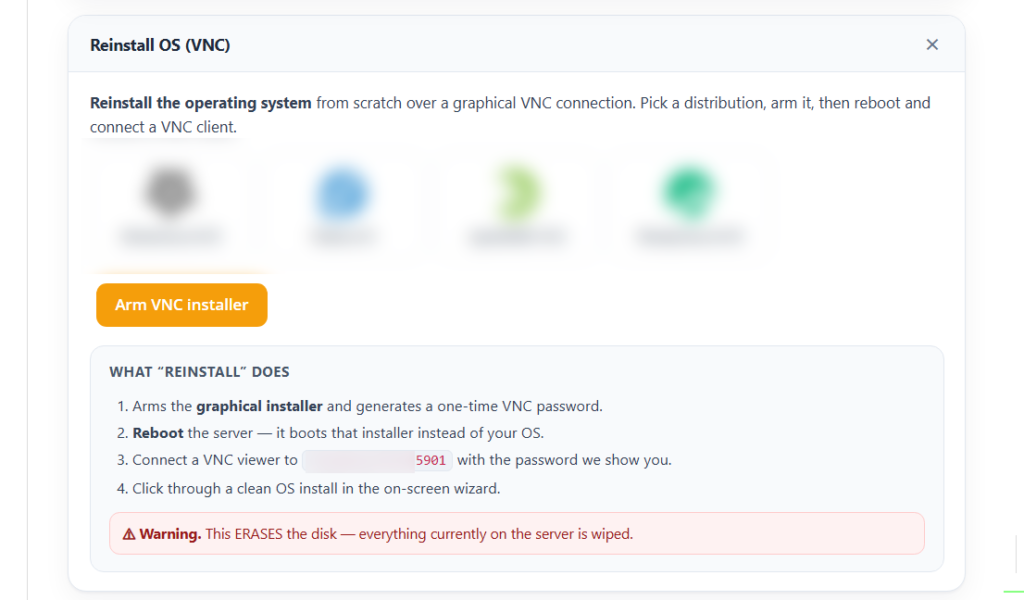
Here is what reinstall does:
- Arms the graphical installer and generates a one-time VNC password.
- Reboot the server – It boots that installer instead of your OS.
- Connect a VNC viewer to your server’s IP on port 5901 with the password we show you.
- Click through a clean OS install in the on-screen wizard.
Bandwidth Overview
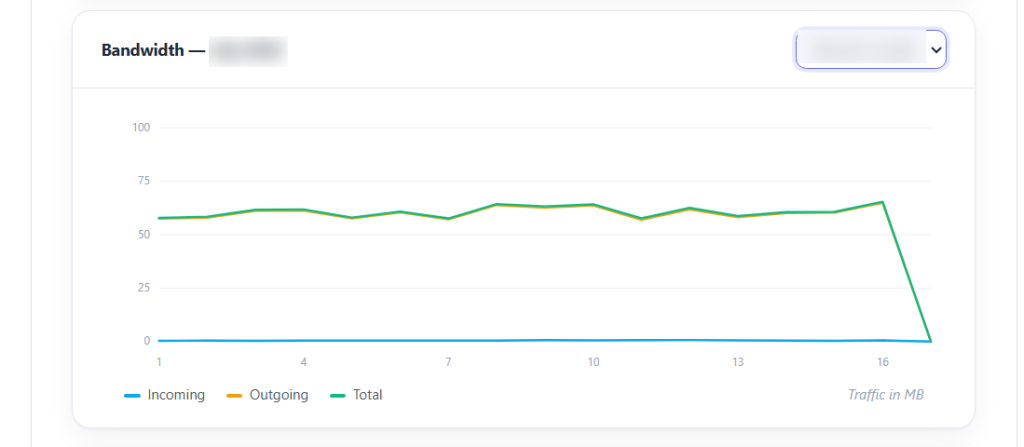
Scroll down to the Bandwidth section to see your traffic usage for the current month. The graph plots Incoming, Outgoing and Total traffic in MB across the days of the month. Use the dropdown in the top right to switch between IPs if your server has more than one.
Interface Information & Reverse DNS (PTR)
Below the bandwidth graph, the Interface Information section lists each of your IPs and subnets along with their gateway and reverse DNS (PTR) record. Unlike our Switzerland servers, you can set your own reverse DNS here without contacting support.
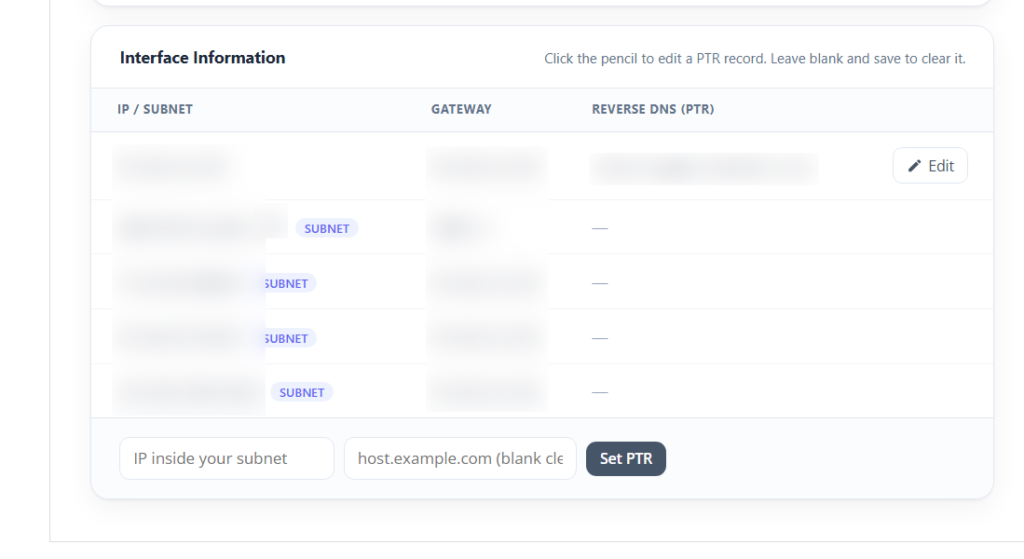
To edit the PTR on a listed IP, click the Edit (pencil) button next to it, enter your hostname and save. Leave the field blank and save to clear the record. For an IP inside one of your subnets, use the fields at the bottom of the table: enter the IP inside your subnet, the hostname you want it to resolve to, and click Set PTR.