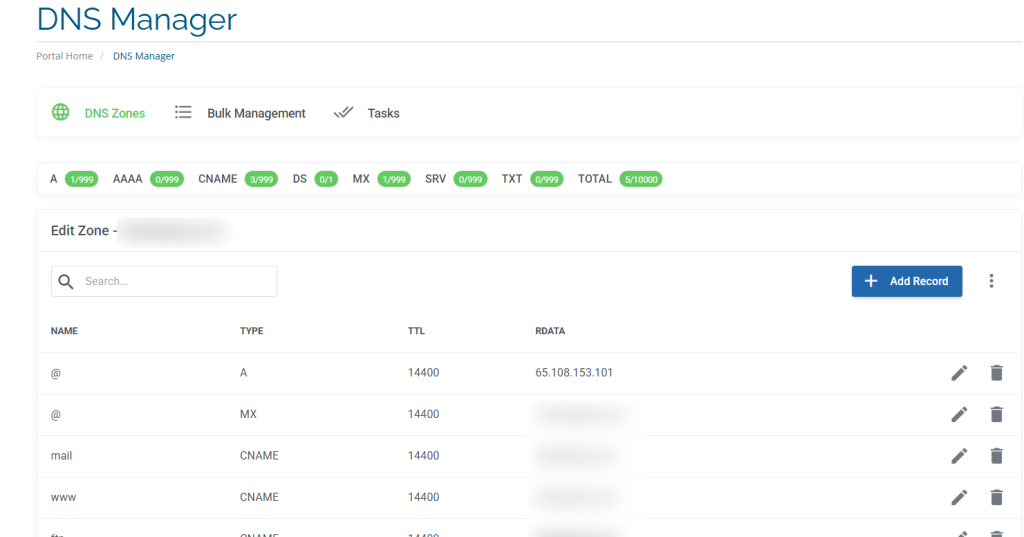
You can manage your domain dns records easily through the Packetra client portal. In this guide, we will walk you through how to add your zone (if it doesn’t exist) and access the DNS records within.
This article is only applicable to those who have an account with Packetra and it assumes that you are already logged into the portal. Don’t have a Domain yet? Check out our Domain Choices. If you already have one feel free to login to follow the guide below
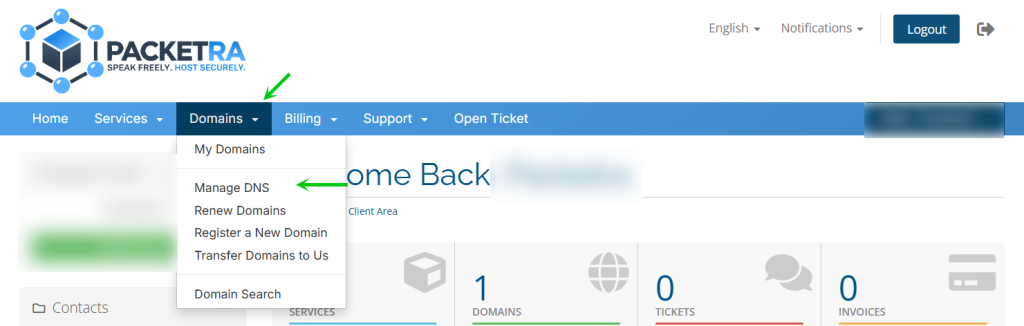
First, click the Domains tab in the top navigation. Then select Manage DNS from the dropdown menu.
Manage Domain DNS Records for Your Domain
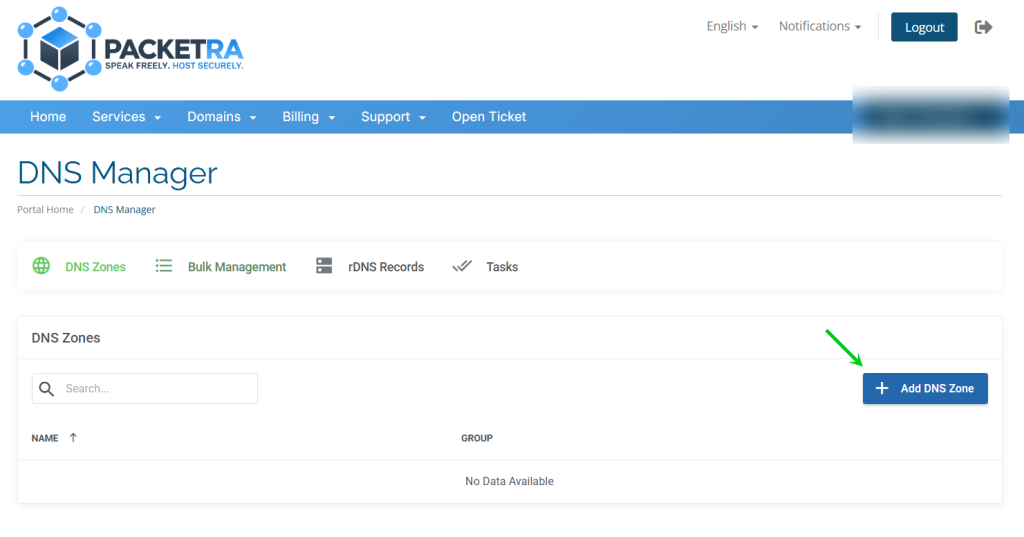
Next, click your domain DNS zone (if it exists). If the domain zone does not exist already, click the +Add DNS Zone button as shown in the screenshot below to create the domain dns zone record.
Add DNS Zone
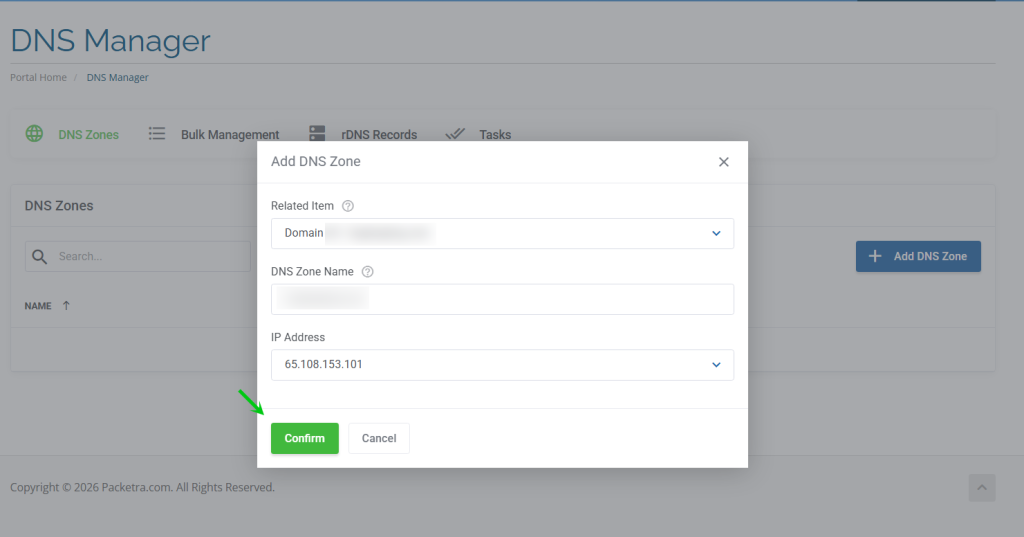
Next, in the popup window select the related item, this will be your domain name, it will automatically populate the IP Address field and you simply enter the same domain name as your DNS Zone Name, and click Confirm.
DNS Zone Added
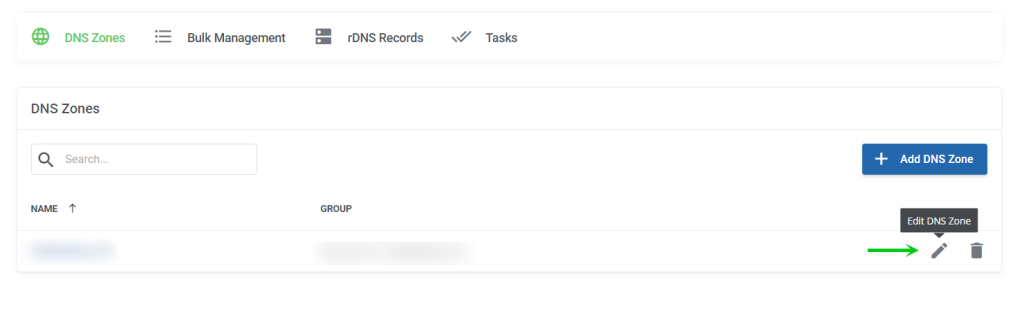
Next, we will click the Edit DNS Zone button (pencil icon) to start editing our zone file.
Add or Remove Domain DNS Records
Finally, we can add and remove domain dns records as needed, we have options of A, AAAA, CNAME, DS, MX, SRV, TXT to choose from. Additionally, you can click the 3 dots, if you wish to perform tasks such as Import records from a BIND file or export to a BIND file to move elsewhere.
That is it, now you know how to manage domain DNS records within the Packetra portal.
Frequently Asked Questions
What is the difference between an A record and a CNAME? An A record points a domain directly to an IP address. A CNAME points a domain to another domain name. For example, you would use an A record for your main domain and a CNAME to point “www” to your main domain.
How long do DNS changes take to apply? Changes apply instantly on our end. However, full global propagation can take up to 24 hours depending on TTL values and DNS caching.
Can I import DNS records from another provider? es. Click the three dots menu in the DNS zone editor and select Import. You can upload a BIND file exported from your previous provider.
Good to Know Always double check your records before saving, as incorrect DNS entries can take your website or email offline. Additionally, if you are planning to add MX records for email, make sure they do not conflict with any existing A records on the same subdomain. You can also export your current zone file as a backup before making changes, just click the three dots menu and select Export. If you have any issues with your service, open a support ticket through the client portal and our team will assist you.